I always thought that setting up a SQL Server instance on an existing Virtual Machine (VM) in Azure would be simple, install SQL Server with the defaults and your done. But Azure is a little different and a hard drive isn’t the same as a hard drive in another environment.
A little background
I would not consider myself a DBA by any means. I am a developer that can install SQL Server on my development machine and use it for projects. The purpose of this post is a problem I ran into setting up Sitecore within an Azure VM.
Sitecore uses SQL Server and MongoDB to store data. A typical test server installs Sitecore into the inetpub folder on the default C: drive. Within this folder, by default, Sitecore installs 3 (or more) SQL databases. I will use Azure to setup test environments for various Sitecore projects. Using the default installation from Sitecore doesn’t work well in an Azure environment, so it needs to be modified.
This post is not about a “production” instance of SQL Server
This post will not go into the many tuning options you can do for SQL Server. However, it can be a start for setting up a SQL Server in an existing VM. There are many performance tuning options you can do to get SQL Server running smoothly and I would suggest reading the Microsoft documentation.
Setting up the Virtual Machine
Microsoft already has SQL Server template VMs in Azure and if you are starting from scratch, I recommend installing one of those VMs. This post is more about adding SQL Server to an existing VM.
When creating your VM, make sure it is a Standard Tier A2 VM or better. This is
recommended by Microsoft. The relevant difference here is the
Input/Output Operations Per Second (IOPs) between Standard and Basic. Standard gives you more IOPs,
The default Windows VM has 1 hard drive, the operating system. This hard drive is configured with caching and is optimized to run the operating system. It is not optimized to run a SQL Server database. So the first thing you should do is add another disk to your VM.
Creating the Virtual Hard Disk
For best performance, you will want to create 2 Virtual Hard Disks (VHDs), one for SQL data and one for SQL log files. However, this isn’t always necessary and for my case I only created 1 VHD.
Before creating your VHD, you want to make sure your storage account is created properly:
- Make sure you storage account is in the same region
- Geo-replication should not be set on the storage account
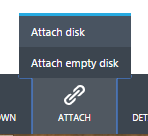
In Azure manager, select your VM and click on the “Attach” icon and select “Attach empty disk”. This will prompt you for a storage location, file name, and size. Select your appropriate values in these fields, but be careful about selecting the Host Cache Preference.
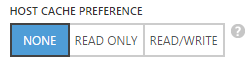
Azure has multiple caching preferences. The operating system disk is set to READ/WRITE. For SQL Server, you want to use “None”
Start your VM with the attached disk(s). At this point, the disks should not be formatted, so start the Disk Management utility within Windows (Windows+X, Disk Management).
You should find your uninitialized disks. Initialize your disk if it isn’t already (right clicking on the disk label and selecting initialize should get it done).
Format your disk by right clicking the partition that is not allocated.
In the format window, make sure you change the default to “64K”. This is the preferred allocation unit size for SQL Server.
You should now be ready to install SQL Server on your VM.
Installing SQL Server
I’m not going into the details about how to install SQL Server here. But you are going to want to make sure the following is configured during your install:
- Put all database and log files on the disks you created, not the system partition
- Put the Data and Log files in separate folders. This gives you dedicated IOPs. Even better, put them on separate virtual disks.
- Enable database page compression
- Limit or disable database auto growth
- Set the default database folder to your data partition
Modifying an existing SQL Server installation
You may be reading this and think, “I already setup SQL Server on my VM and I need better performance!” Not to worry, you can modify your existing SQL Server install.
The trick is to move all of your databases to the new locations, including your system databases.
I have found the following process works to move the databases. Your order and methods may vary.
Moving existing databases
The easiest method I have found is to detach the database, move the database files to the new location, then reattach the database files.
I’m a visual person, so I’ll give instructions using SQL Management Studio (SSMS). All of the following steps can be done with SQL Commands.
- Right click on the database in SSMS and select detach.
- In the Detach Database dialog, your database will be listed with three columns of interest:
Drop Connections – Select to drop any existing connections to the database
Update Statistics – Select to update the statistics on the database before dropping.
Status – Should say “Ready” to indicate it can be dropped. If anything else, you should investigate.
- Click the OK button to drop the databases.
- Depending on the size of your database, and if you checked the update statistics box, this may take some time.
- When complete, copy the Database and Log file to the new locations on the new data drive that you created above.
- Back in SSMS, navigate to your Databases folder
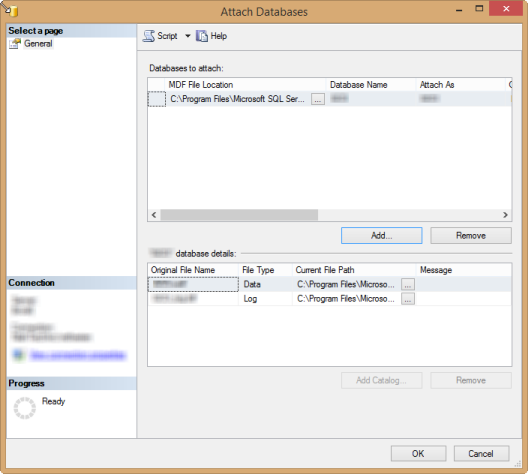
- Right click on the Databases folder and select Attach
- Click the Add… button and browse to the database file you moved earlier
- The MDF file location should appear in the grid. The files associated with the database will appear in the grid at the bottom of the window. Verify the Current File Path for each file listed. If you moved the log file to a different location, you may need to adjust the path to the new location.
- Click the OK button to re-attach the database to your system.
- Look in your object explorer and the database should be in the tree.
- Repeat the above for each database you want to move to the new drive.
Moving the system databases (except master)
The system databases need to be moved a little differently. You need to use classic SQL commands to notify the master database the location of the new system databases.
Open a new query window and run the following query for the system database you are moving.
SELECT name, physical_name AS CurrentLocation
FROM sys.master_files
WHERE database_id = DB_ID(N’tempdb’);
GO
The script above is for tempdb. You will need to replace tempdb above with the database you are moving. The script will return the logical name and path for each file associated with the database.
Run the following query, to move each logical file’s path to the new location.
USE master;
GO
ALTER DATABASE tempdb
MODIFY FILE (NAME = tempdev, FILENAME = ‘E:SQLDatatempdb.mdf‘);
GO
ALTER DATABASE tempdb
MODIFY FILE (NAME = templog, FILENAME = ‘F:SQLLogtemplog.ldf‘);
GO
Change the script’s database, logical file name variables, and path. Be sure to use the path that will be the new location of the file.
This will move the location of the files in the database, but not the actual files. Once you do the above for each system database (except master), stop and start your SQL Server service.
Go back into SSMS and verify that the databases are working properly.
Moving the master database
Since the master database is the all controlling database, you need to move this database manually and change the SQL Server service parameters to point to the new location of master.
In order not duplicate the instructions here that are already made by Microsoft, you can view
Microsoft’s documentation on this.
Conclusion
This post has given you a basic understanding of how to setup SQL Server on an Azure VM. The methods listed above have worked for me without incident. Your configuration and databases may need adjustments to the steps above. I strongly recommend you review the documentation referenced below before attempting this move on your own system.
Referenced Resources
The following resources were used in developing this blog entry:


wonderful information, I had come to know about your blog from my friend nandu , hyderabad,i have read atleast 7 posts of yours by now, and let me tell you, your website gives the best and the most interesting information. This is just the kind of information that i had been looking for, i'm already your rss reader now and i would regularly watch out for the new posts, once again hats off to you! Thanks a ton once again,
Regards, sitecore training in hyderabad
I have been reading out a lot of your articles.
I will certainly bookmark your Blog.
Free Devops Training
Hybris Training
Emc San Training